In a recent Hack & Craft community event we were discussing ways to adapt patterns for knitting and crocheting. In theory, as long as you make sure you have an accurate stitch and row gauge you can adapt patterns between knitting, crochet, and sewing. I figured I'd share my go-to easy sweater pattern because at its core it is just a series of rectangles and you can adapt it in so many ways from there. You can play around with the materials you're using, the stitches, whether you want to add trim, frills, or fastenings, etc.
Gauge
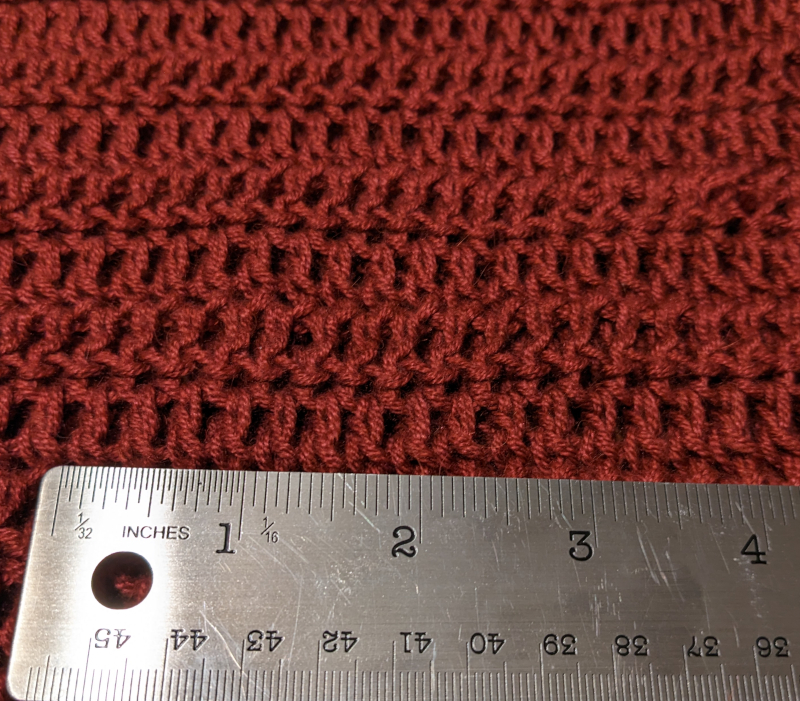
If you are knitting or crocheting, it is important to be able to predict what size your project will come out. To do that, you make a swatch or square typically around 4"x4". You want to use whatever stitch you plan on for your sweater (i.e. for one of my example sweaters I used a double crochet, for the other I alternated a double crochet with a lace pattern). Then you measure how many stitches per inch (stitch gauge), and how many rows per inch (row gauge).
Variation 1
Measurements
- Waist circumference (if you want this to be an standard cardigan, measure waist as-is. If you want more of a wrap sweater, add the amount of overlap buffer you want).
- Desired length from base of neck to hem
- Shoulder to wrist
- Arm circumference (from bicep)
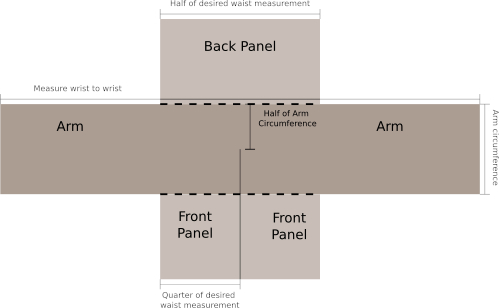
In the first variation, you make the torso as a solid piece and the arms separately.
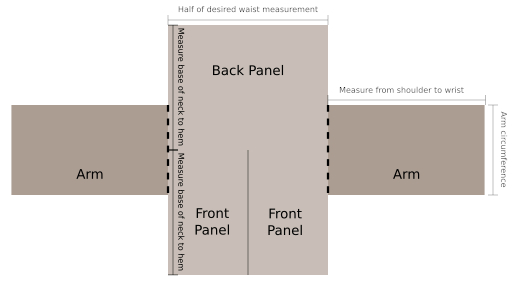
Torso
Using the gauge and measurements above, calculate how many stitches you need to get half of your waist circumference and cast on/chain. Continue with your chosen stitch pattern until you reach the measurement for your desired length from base of neck to hem.
On the next row, stitch until half your initial cast-on number then turn. Continue with the first front panel until you again reach the measurement for your desired length.
Join a new strand to the back panel from the split where you stopped for the first front panel and add the second front panel. *Note: if you are using a pattern and you start the second panel from the edge instead of the split, your pattern may be uneven. Continue second panel until you reach the measurement for your desired length.
Arms
Using the gauge and measurements above, calculate how many stitches you need to get the measurement from shoulder to wrist and cast on/chain. Continue with your chosen stitch pattern until you reach the measurement for your arm circumference.
Joining it together
Stitch the arms so they are centered on the torso piece.
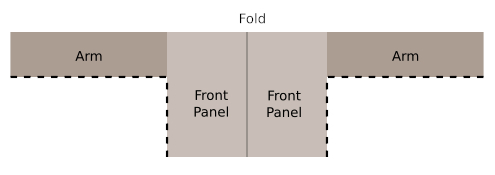
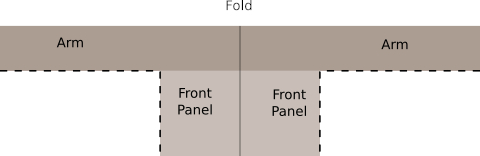
Fold the joined pieces in half at the center of the arms. Stitch from the bottom of the arm to the bottom of the torso together on each side.
Variation 2
In the second variation, you make a solid piece from one wrist to the other, then add the back and front panels. This is useful if you're going for a bolero or an empire waist.
Measurements
- Wrist to wrist
- Arm circumference (from bicep)
- Waist circumference (if you want this to be an standard cardigan, measure waist as-is. If you want more of a wrap sweater, add the amount of overlap buffer you want).
- Desired length from under bust to hem
Arms
Using the gauge and measurements above, calculate how many stitches you need to get the measurement from wrist to wrist and cast on/chain. Continue with your chosen stitch pattern until you reach the measurement for half your arm circumference.
On the next row, stitch until half your initial cast-on number then turn. Continue with the first front panel until you reach the measurement for your arm circumference.
Join a new strand to the back panel from the split where you stopped for the first front panel and add the second front panel. *Note: if you are using a pattern and you start the second panel from the edge instead of the split, your pattern may be uneven. Continue second panel until you reach the measurement for your arm circumference.
Torso panels
How you proceed from here depends on what you want the bottom of your sweater to look like. Option 1 is the easiest to make, it's just a back panel and two front panels in simple rectangles that you attach to the top of the sweater. In option 2 you work the bottom of your sweater directly onto the top portion and you work in the round. For example, I used this option on a sweater where the bottom was a loose crochet lace where a seam would be extremely visible.
Option 1
Back Panel: Using the gauge and measurements above, calculate how many stitches you need to get half of your waist circumference and cast on/chain. Continue with your chosen stitch pattern until you reach the measurement for your desired length from bust to hem.
Front Panels (x2): Using the gauge and measurements above, calculate how many stitches you need to get a quarter of your waist circumference and cast on/chain. Continue with your chosen stitch pattern until you reach the measurement for your desired length from bust to hem.
Stitch the back panel so it is centered on the arm piece. Stitch the two front panels aligning with the slit in the arm panel.
Fold the joined pieces in half at the center of the arms. Stitch from the bottom of the arm to the bottom of the torso together on each side.
Option 2
Fold the arm piece in half. Measure and place stitch markers at half of your waist circumference centered in the arm panel. Stitch the bottom seam of the arms to that point.
Join a new strand in the front center of the arm piece (lining up with one side along the slit). Continue with your chosen stitch pattern until you get to the arm seam, then continue onto the back panel. Continue along the back panel and around to the other front panel. Continue to stitch the torso of your sweater as one piece with no side seams until you reach your desired length.
Morgan's Variations
There are a lot of ways you can embellish this simple pattern. You can play around with contrasting colors and stitch patterns for trim or in the different pieces of the pattern. You can use any stitch style you want. You can add buttons, ties, or a belt for closures or you can leave it an open-front cardigan. I've done two that are still in my rotation:
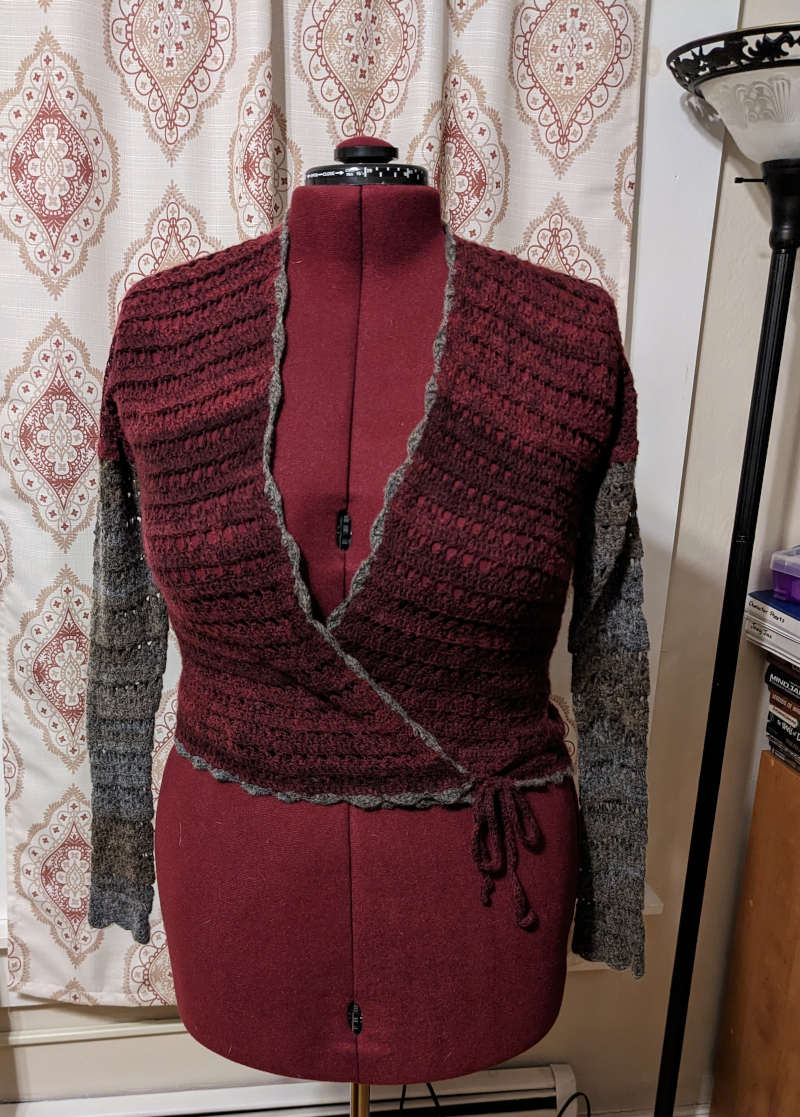
Wrap Sweater
This one I stayed pretty close to the Variation 1 pattern above. I got the yarn on clearance and I had a limited supply, so instead of measuring my prefered length, I just crocheted until I was halfway through my burgundy yarn then did the split for the front panels. Since it ended up being mid-waist length, I added ties to make it a wrap sweater.
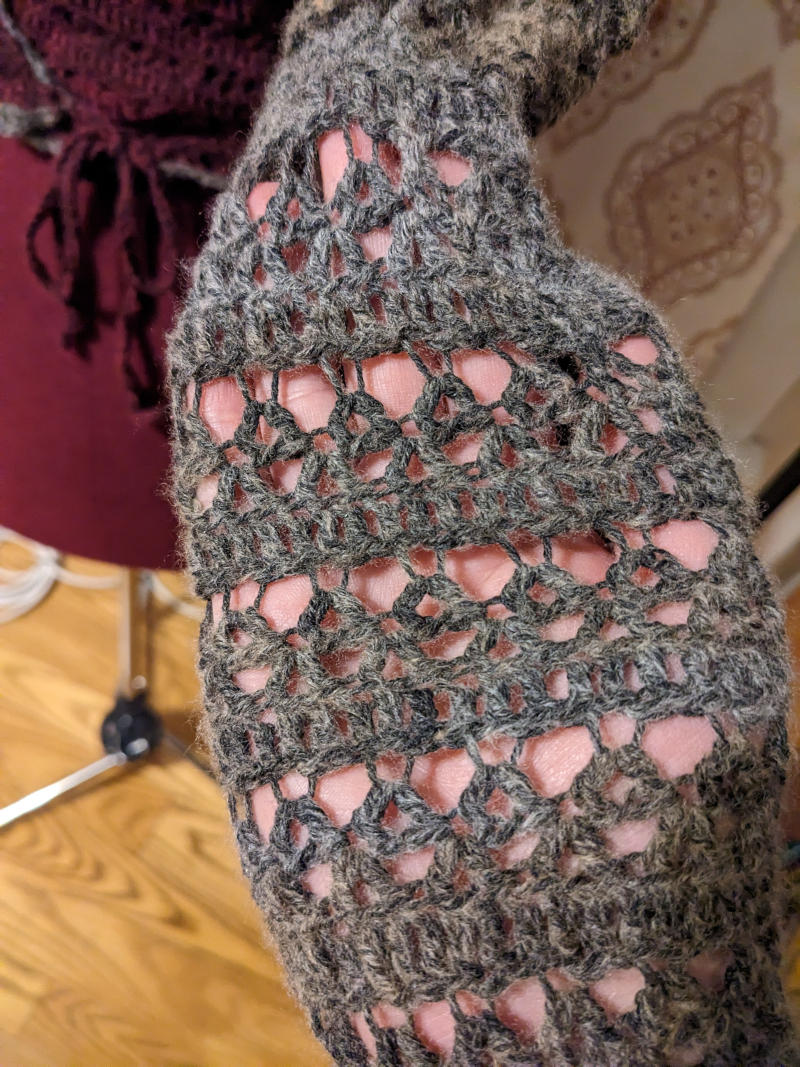
I alternated betweea double crochet and a lace pattern so that it would be lightweight but have some structure to it.
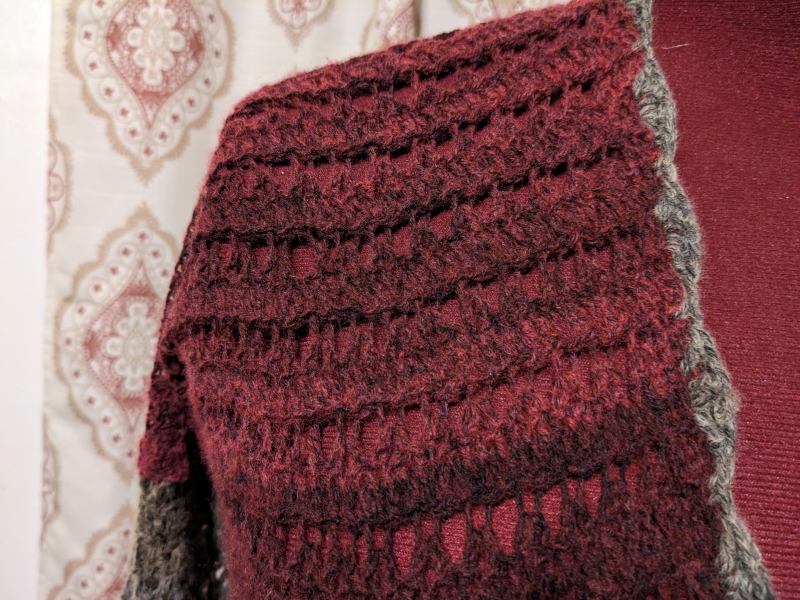
I had a small amount of gray yarn left after I finished the sleeves so I added a fan pattern trim along the edge
Deep V Cutaway sweater
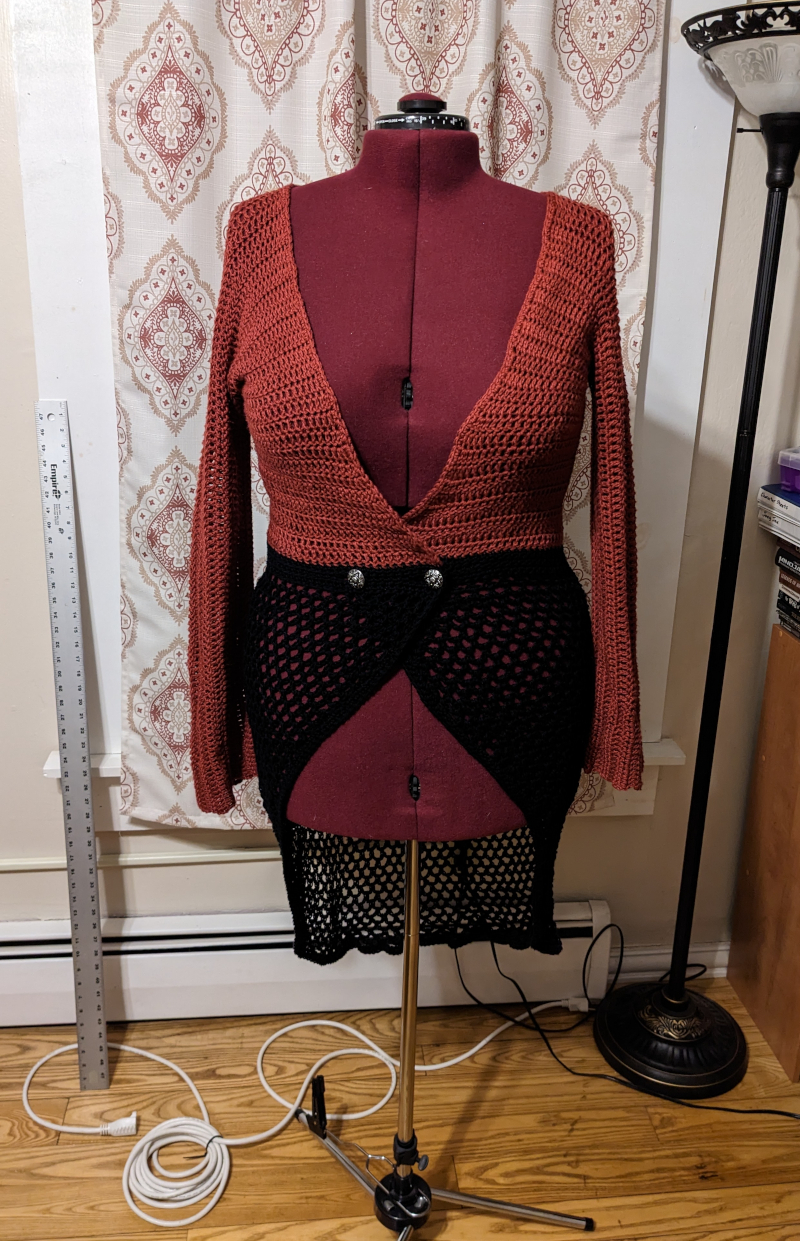
For this one I made a few more alterations on the Variation 2 pattern. I left more space between the two front panels (instead of a slit), so the top is more open than the standard pattern. The bottom of this sweater turned into almost more of a cutaway skirt. I leaned into the vaguely tuxedo tails-ish shape and added two buttons for the closure.
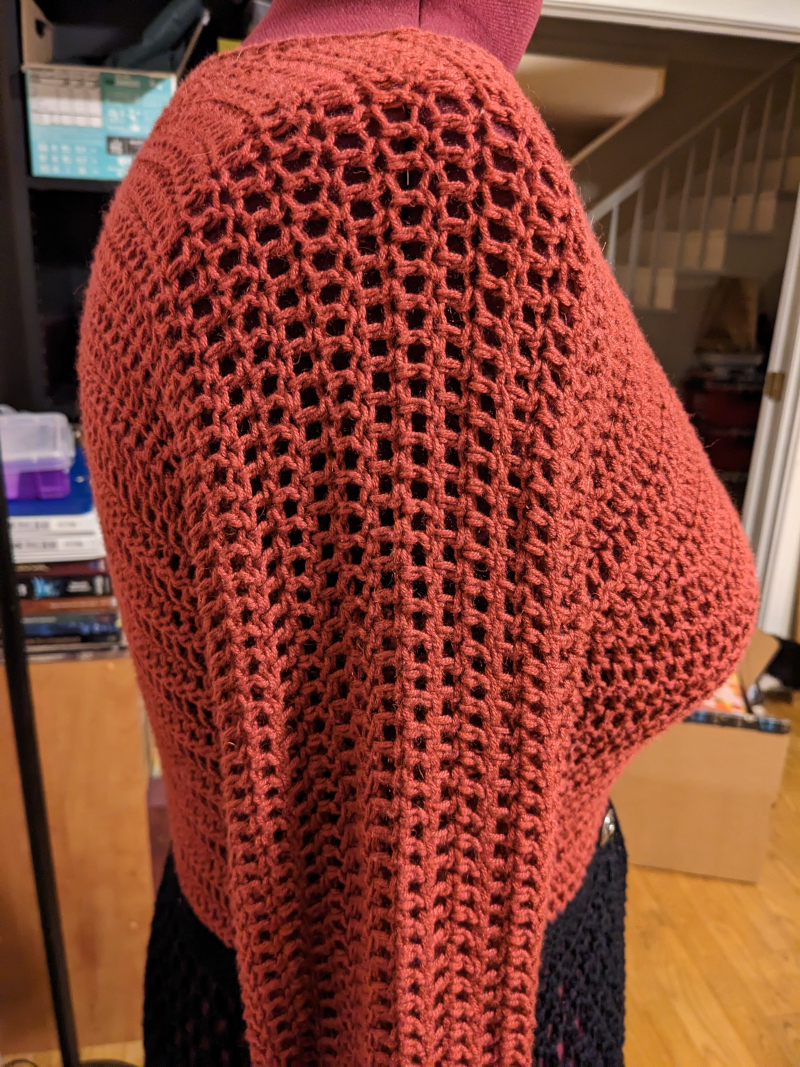
For the top of the sweater I double crocheted with spaces between.
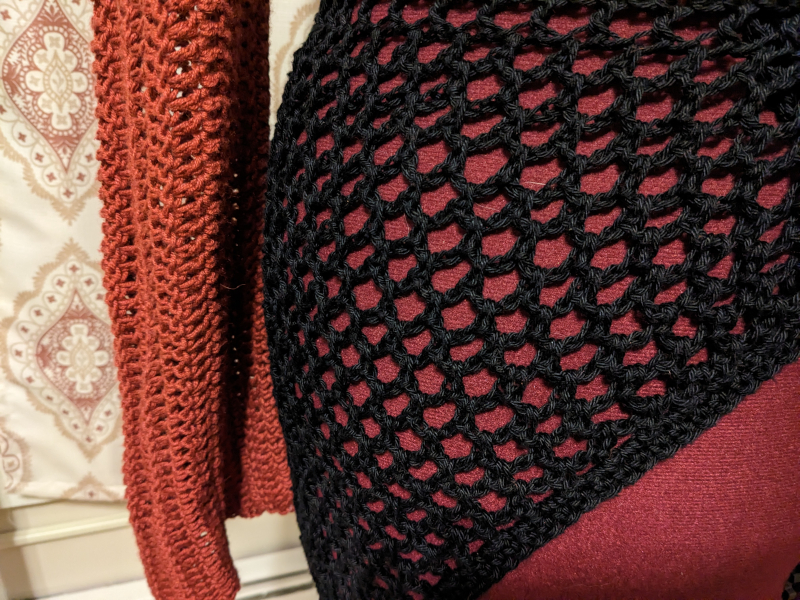
For the skirt of this sweater I went with a loose netted lace pattern and added a half-double crochet border to give it a bit of definition.
Bonus cat picture
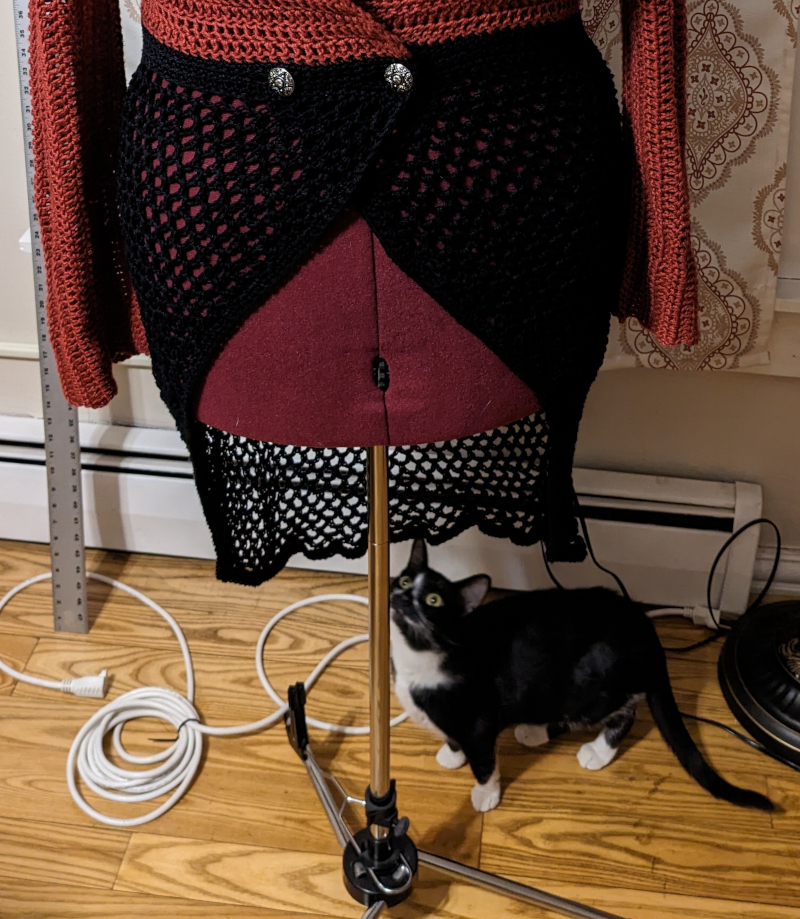
When you have cats and have fabric hanging off of a dress form, you will eventually have a cat trying to calculate if she can get away with pawing at it. Spoiler: she did not get away with it.
Free Soft Wear
This tutorial is released under CC BY-SA 4.0! Please feel free to share and adapt the content of this post!