Repetative Strain Injuries (RSI) in the wrists are an extremely common problem for programmers, graduate students, and crafters since they are caused by over-using your hands doing repetative motions such as typing or knitting for long periods. Given this, both Christine and I have needed wrist braces intermittently for over a decade. These are widely available commercially; however, we've each had some difficulties finding gloves that suit our needs. We've tried a wide variety of options and most left something to be desired. Christine found one style that worked for her but they are no longer available (leading to Christine wearing the same tattered pair of RSI gloves for the past 5 years until they barely functioned). I liked the same style as Christine for typing and crafts and another style for driving but then I developed an allergy to synthetic fabrics and was left with the unfortunate decision to either push through RSI pain unsupported or knowingly give myself an allergic reaction whenever I had a flare up.
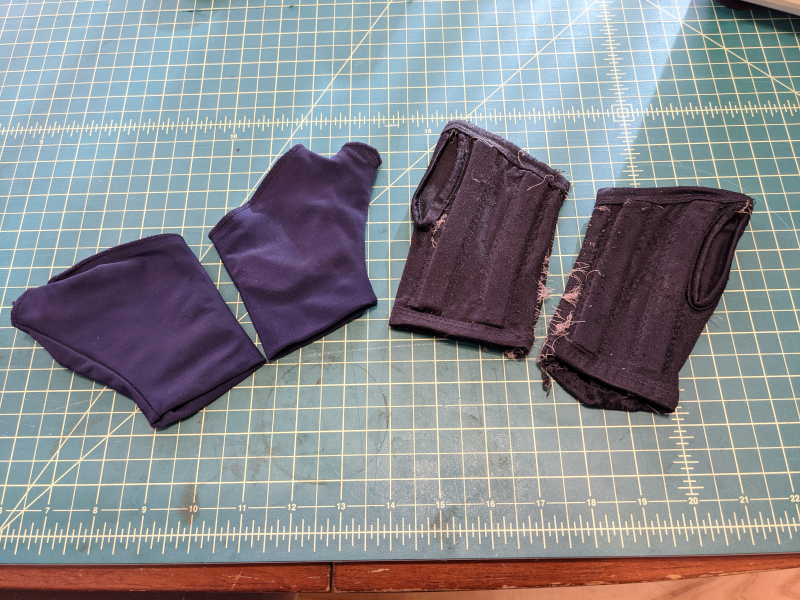
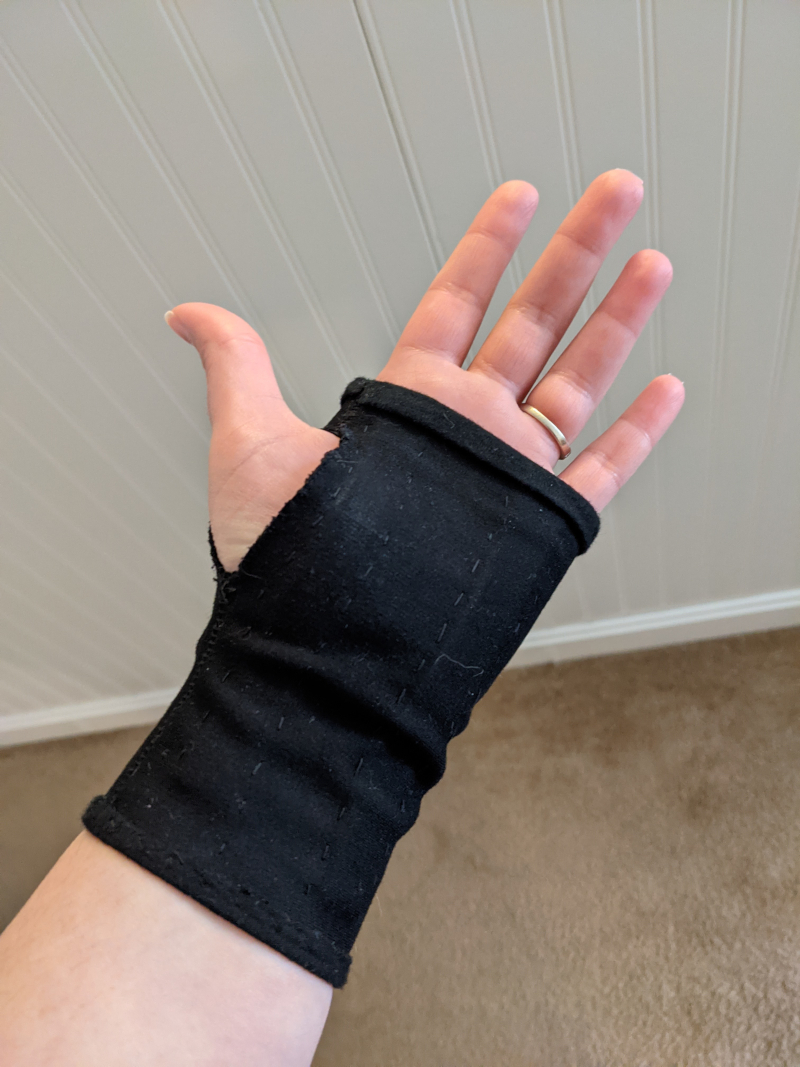
As a crafter, I ultimately decided that I just needed to make my own RSI gloves. This pattern has two variations: the first uses a performance spandex fabric for the compression element and a cotton-knit fabric to serve as a lining, the other uses a single piece of performance spandex for each glove. I use the lining because of my allergy, but others might find it more comfortable as well. Alternately, if you want to make snazzier gloves you could use this variation but have the spandex on the interior for compression and a patterned or colored cotton knit on the exterior.
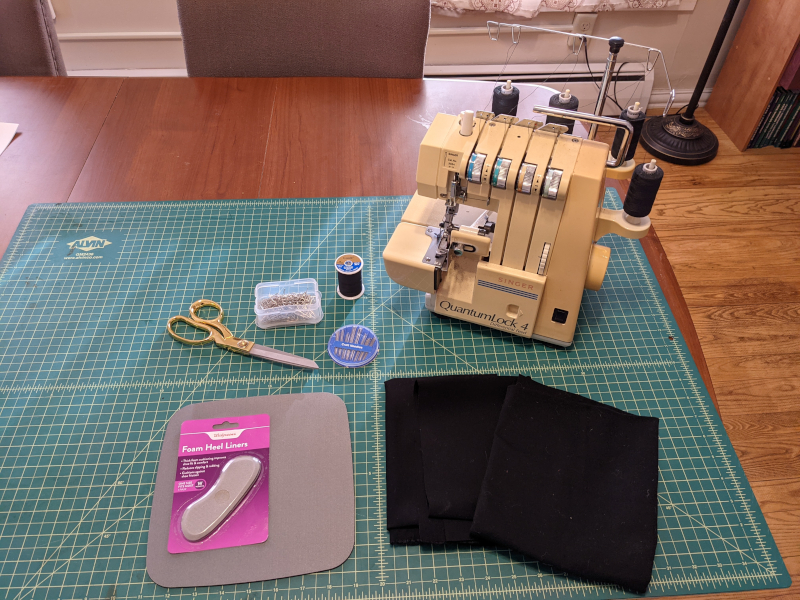
Supplies Needed:
- Scissors capable of cutting two layers of fabric
- An exacto knife or scissors capable of cutting padding
- Straight pins
- A mode of measurement (tape measure, ruler, grid mat, cubits and spans, etc)
- A serger sewing machine is ideal for this project because the final product needs to stretch. If you're using a standard sewing machine, you can use a zig zag stitch with a high stitch width and low stitch length. If you are sewing by hand, you want to use something that has some give like a backstitch or a zig zag.
- Sewing needle (the later stages of this project need to be hand stitched because a small tube of fabric won't fit on most home sewing machines)
- A seam ripper is always helpful
Materials:
- A fabric that has a high spandex or nylon content that will stretch but not give out with repeated use (I used performance spandex from JoAnn Fabrics). I'd suggest having enough fabric to make a couple of passes since the precise amount of compression for your wrists might take some experimentation to find. I got a 1/4 yard of this fabric and have made 5 successful pairs of gloves and a few failed experiments.
- If you're using a lining, you'll need ~5.5x7" of this fabric per glove.
- If you're not using a lining, you'll need ~12"x7" of this fabric per glove
- A cotton knit fabric that stretches well (optional for variation 2)
- You will need ~6.5x6.75" of this fabric per glove
- Something to use as padding for your wrists or the heel of your palm. You want something that is flexible and cushions but also durable enough that it'll withstand regular use and potentially being run through a washing machine. I tried two successful variations of padding. For one I cut up a mouse pad to make strips, the other I used heel grips/liners (the product that you would stick to the heel of your shoe if they were giving you blisters or just a tad too big). You can get creative if you've got other solutions!
- Thread
Measurements:
For RSI gloves you want enough compression to support your wrists but not enough to cut off or restrict circulation. I do not have your wrists in front of me to measure, so you might have to do some experimentation to figure out what works. I took the dimensions of RSI gloves that we had at home and experimented as I went until I found the sizes that worked for Christine and I. Even if you go this route, keep in mind that the elasticity of your fabric might not be the same as your old RSI gloves, my performance spandex was more restrictive than the spandex of one of my previous sets of gloves and therefore those measurements were too tight when I tried that width.
The length you can determine based on preference. You will do a rolled hem at the wrist of the glove (and at the top as well if you're using a lining), so you want the bottom layer of fabric to be ~ .5" - 1" longer than the top.
I'll give the measurements I used for our gloves below as an example:
-
Morgan (generally smaller hands/wrists): outer fabric 7"w x 5.5"l; inner fabric 6.75"w x 6.5"l
-
Christine: one piece of fabric 12"w x 7.25"l
Stage 1 :
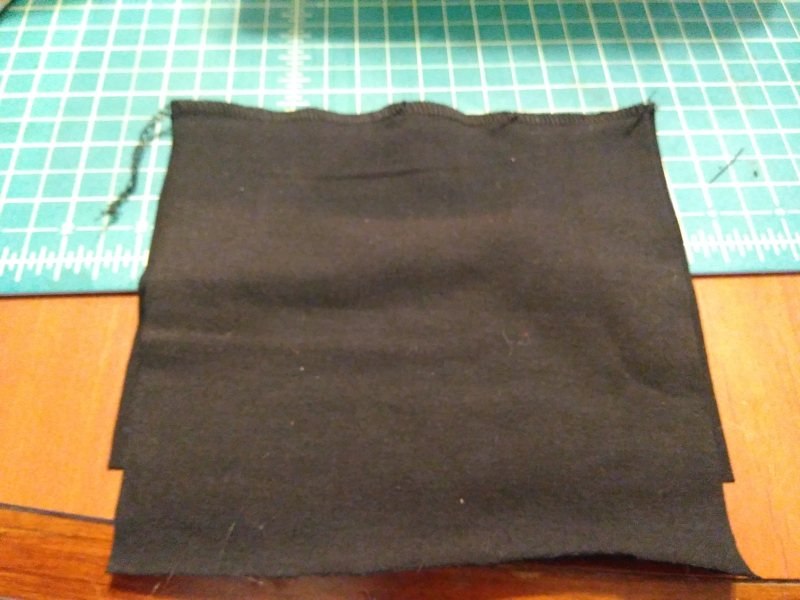
- Cut your fabric to the measurements that work for you.
- If you are using a lining fabric, align the two pieces with right sides facing and sew top
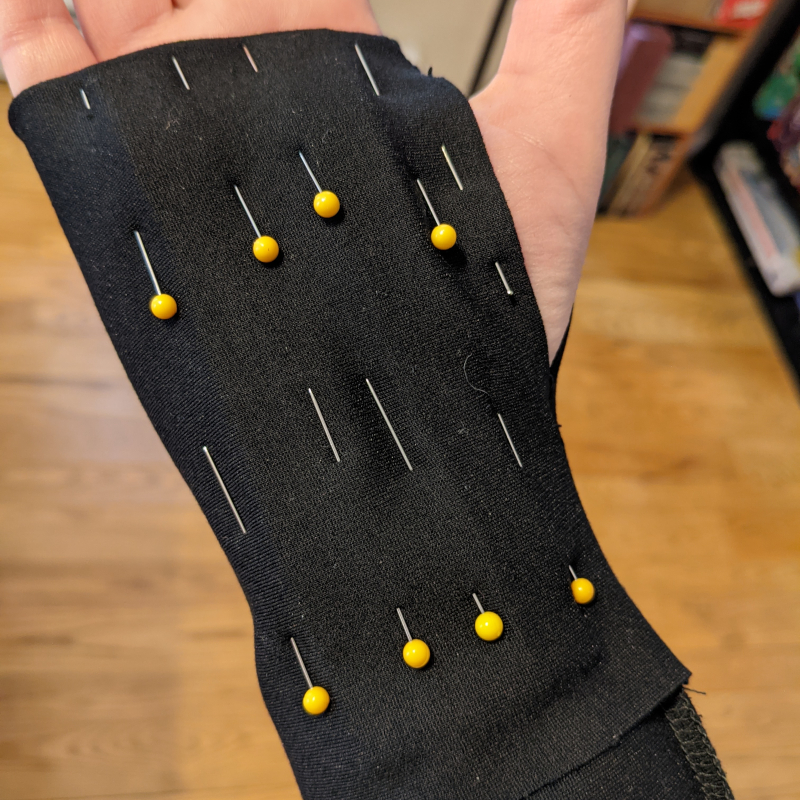
- Fold fabric in half lengthwise with right sides facing and pin so that the fabric doesn't move (yellow pins in photo)
- You will essentially be sewing the side seam of your gloves but leaving gaps in the seam for the thumb hole. Mark out where your seam needs to start and stop (I did this with pins because I was using a dark fabric and my fabric marker wouldn't be visible)
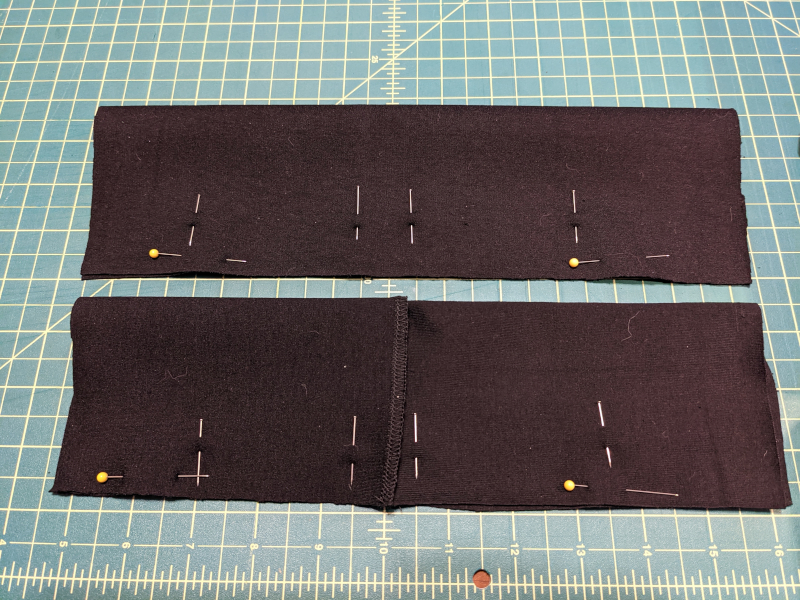
- In the photo, I started from the left (on the spandex fabric for the lined gloves): I first measured 2" in and marked a gap of 2.5" (3" for Christine's because she wanted more space), then a seam of 1", then a gap of 3" (I left this gap bigger to leave a buffer of where the thumb hole would align once I turned the glove right side out), then a seam of 2.5"

-
Sew your side seams. Note: It's very hard to stop at a precise mark on a serger, so I overshot these seams a bit then used a seam ripper to get it to the precise spacing I wanted
-
Fold exterior side of the glove over the interior. Align the thumb holes and make sure that there is excess fabric on the inner layer for your rolled hem. Pin in place.
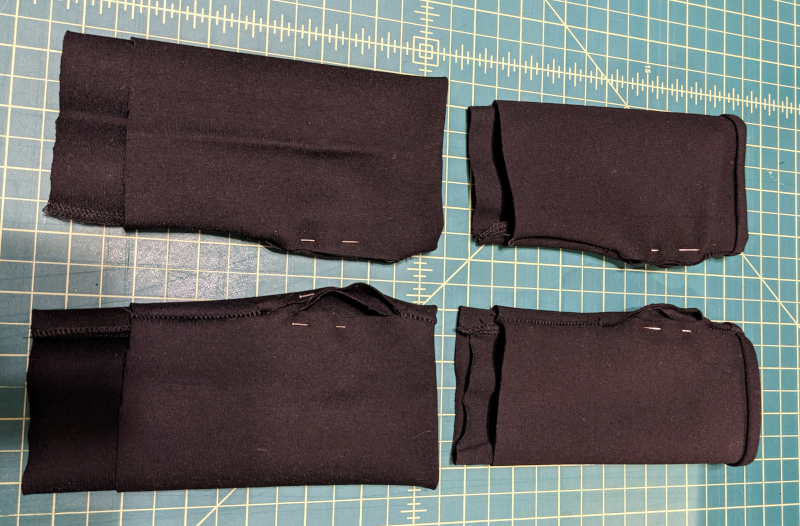
- Now is a good time to try the gloves on and see if they fit correctly (before you have too many seams/pins to take out if you need to make corrections). If they're too loose, you can do a second pass at the seams to make them a bit smaller.
Padding:
I'm including three options for padding here for different use cases.
Crafting
- If you're using these primarily for crafting where you aren't resting your wrists or palms on any surface as you work you don't really need the padding (this is the type of compression glove you typically find in craft stores). You can skip this step!
Typing
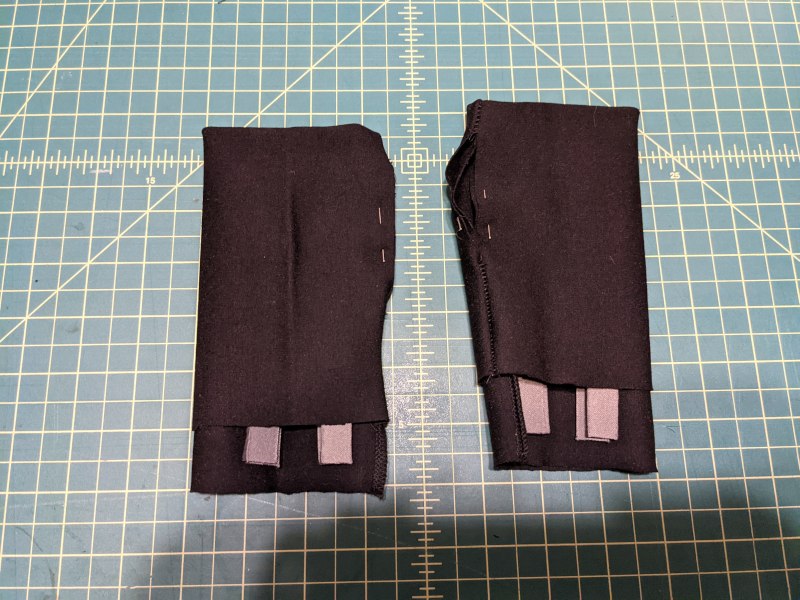
- If you're typing a lot, Christine and I both prefer two parallel lines of padding running the length of the glove from fingers to wrist.
- Cut strips of padding to .5" x 4.75" (I used a 1/8" mouse pad and used 2 strips per glove, Christine wanted more padding so I doubled them up and used 4 strips per glove
- Place strips between the two layers of fabric parallel to each other in approximate location of palm.
- Put glove on and adjust the strips so that they are aligned comfortably and will cushion your wrist where it would fall on your desk/workspace. Pin them in place.
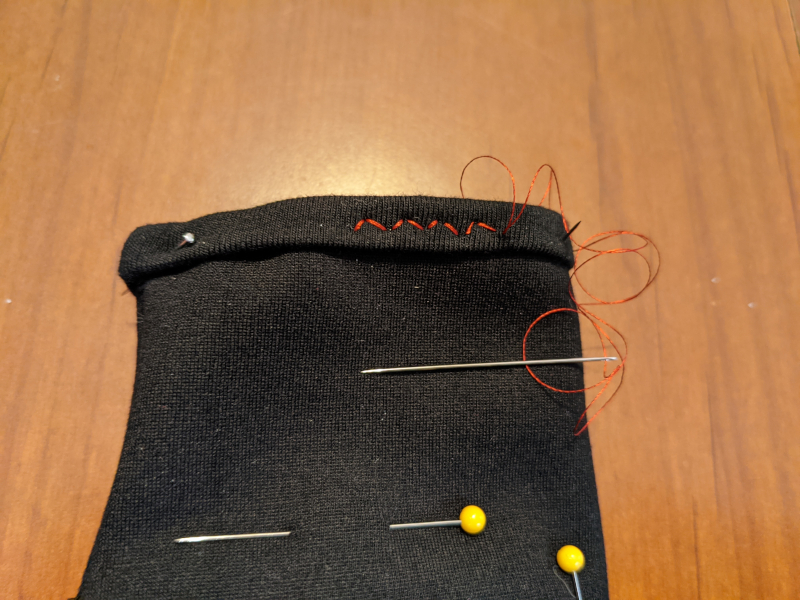
- Use a needle and thread with a stitch that has some give and will stretch (like a backstitch) to sew the two layers of fabric closed around the pads

- Note: Since you're only seeing the top, this might look like a straight stitch, but it's backstitch with spacing. If you do a straight stitch it will not stretch.
Driving
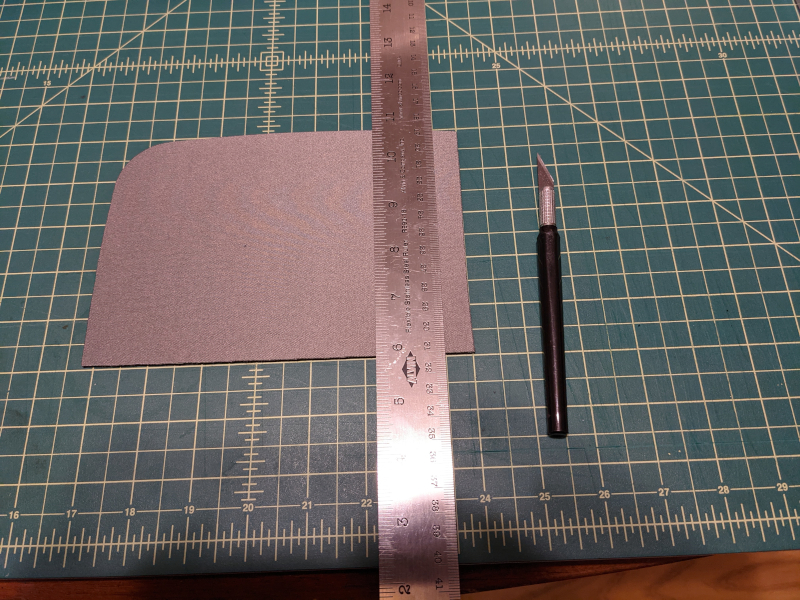
- For driving, I prefer a curved padding that sits at the heel of the palm and doesn't interfere with my grip on the steering wheel.
- For this I am using heel grips/liners (the product that you would stick to the heel of your shoe if they were giving you blisters or just a tad too big). If these aren't available to you, you can cut the shape you want out of a mousepad or come up with other creative solutions.
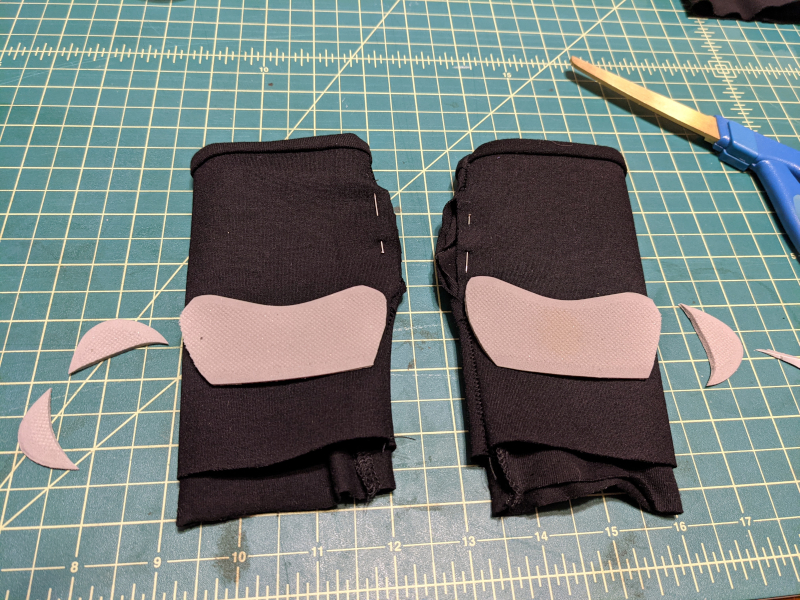
- Out of the box these were too wide to fit in my gloves, so I had to cut them down to fit but I maintained curved edges at the top
- Place the grip between the two layers of fabric in the approximate location of the palm.
- Put glove on and adjust the padding so that it is aligned comfortably and will cushion the heel of your hand (If possible, align it so that the steering wheel fits within the curve of the padding). Pin them in place.
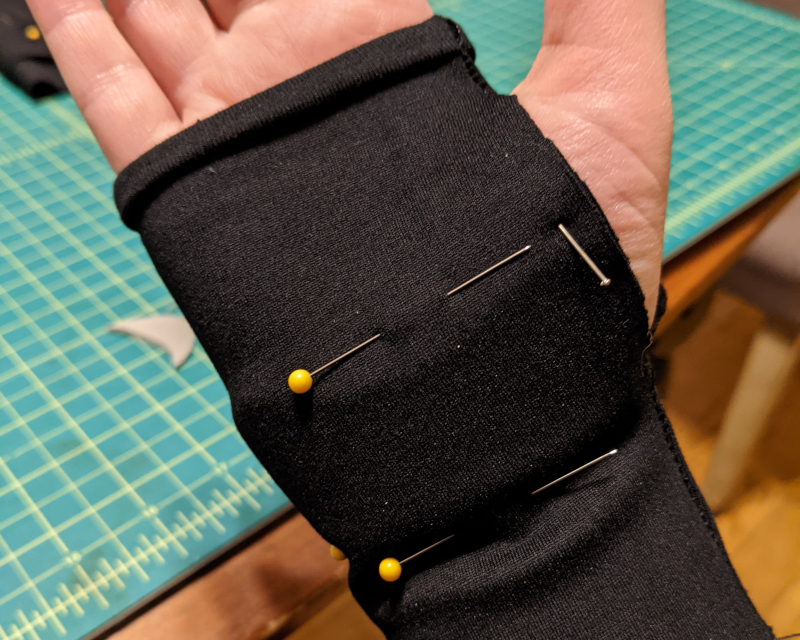
- Use a needle and thread with a stitch that has some give and will stretch to sew the two layers of fabric closed around the pads
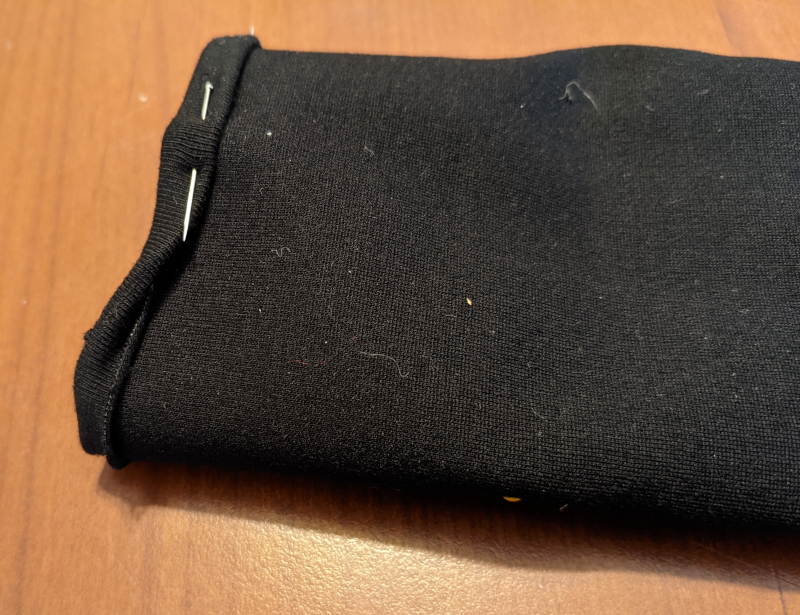
Finish the exposed edges
- Use an overstitch or zig zag overstitch to sew the two layers of the thumb holes together. Range of motion in the thumbs is especially critical so you don't want to do a blanket stitch or a buttonhole stitch that would restrict the fabric from stretching. This doesn't finish the edges perfectly and you might get some fraying with extended use, so if anybody has a more durable solution to this step I'd appreciate the feedback!
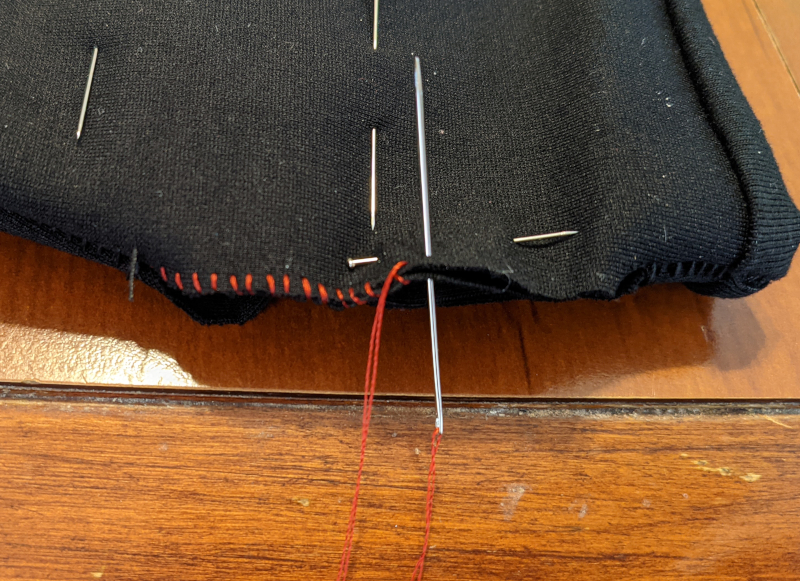
- Double hem or roll hem the wrist (fold the excess fabric at the bottom once to hide the exposed edge of the fabric then fold it again and pin it in place).
- Use a needle and thread with a stitch that has some give and will stretch (like a backstitch or zig zag) to sew the hem in place
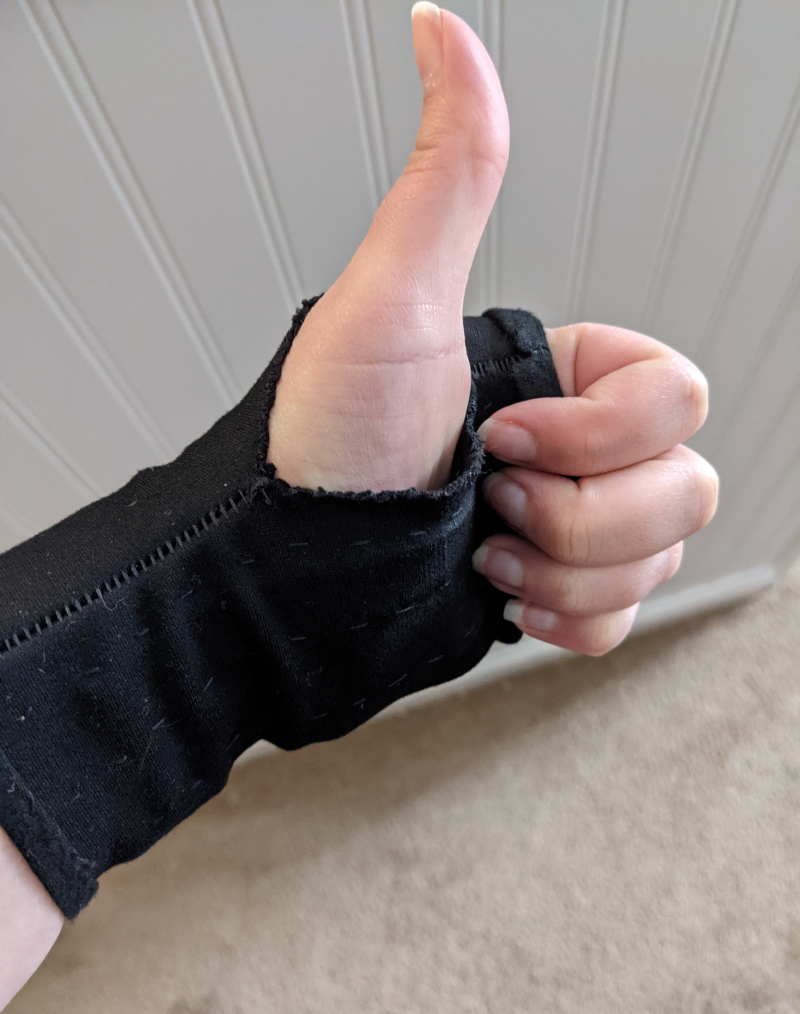
Congratulations! You've now got compression gloves to help your RSI!
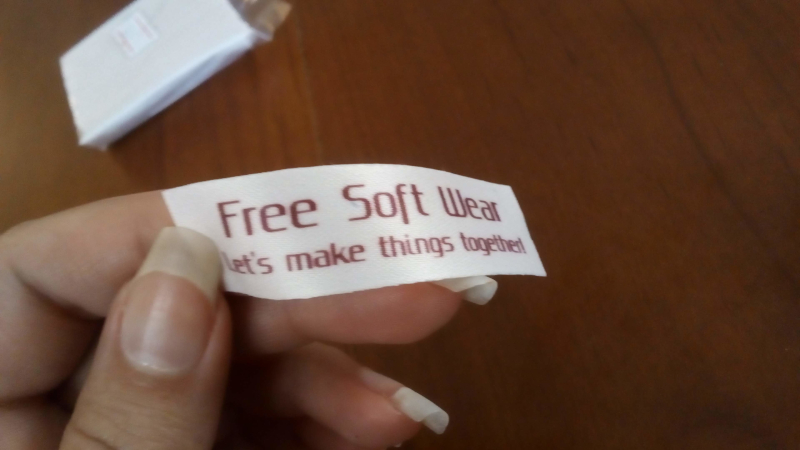
Free Soft Wear
This sewing tutorial is released under CC BY-SA 4.0 by Morgan Lemmer-Webber. Please feel free to share and adapt the content of this post!