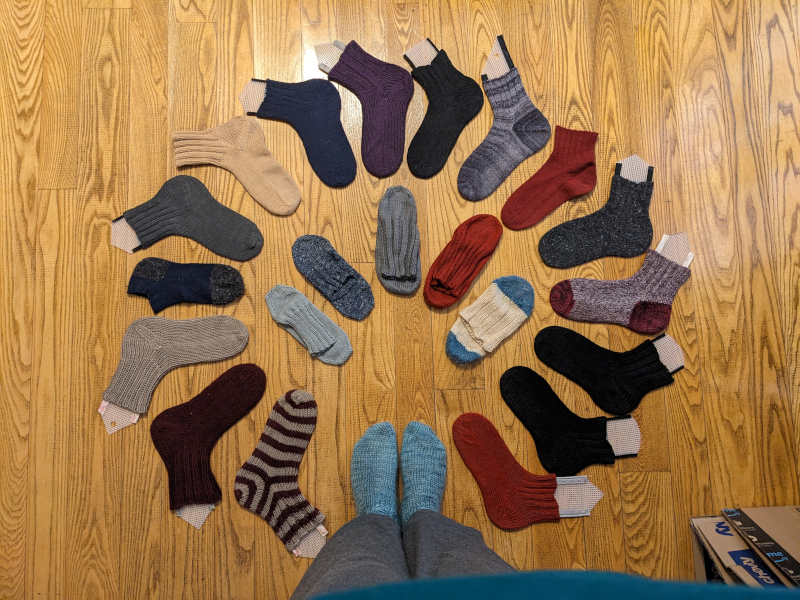
As we talked about in a recent episode of Foss & Crafts, I have recently developed a contact allergy to synthetic fabrics. This has resulted in lots of creative work-arounds to keep myself clothed without having allergic reactions. However, the one thing that I have been unable to find at all commercially available with no synthetic fabrics is socks. Most “wool” or “cotton” socks on the market have at least 50-25% synthetic material. Even most hand knit socks you can find on the market have some percentage of poly- or acrylic fibers in them for durability (if you are charging for the amount of actual labor it takes to hand knit a pair of socks, customers are going to want to get more than a few uses out of them before they start to show wear).
Although I have been knitting since I was a kid I’ve been afraid of knitting socks for most of my life. They seemed too complicated, too fiddly, too easy to mess up. However, now I have sufficient motivation and last December, when a tree root infiltrated our sewer line right before Christmas causing us cancel our travel plans last minute, I finally had the opportunity to learn. I spent a decent amount of time watching videos and researching before I actually broke out the needles. I decided on this How To Knit Socks For The First Time tutorial to start with. It is a toe-up afterthought heel pattern using a magic-loop technique.
Overall I liked the pattern so much that I stuck with the bare bones but with some alterations:
-
I decided I prefer cuff-down over toe-up. Toe-up is nice when you’ve got a limited amount of yarn and you want to just knit until you’ve reached half of your supply, but cuff-down looks cleaner in my opinion and the cuffs stay up better.
-
I wanted to be able to use different sizes of needles and yarn weights without having to re-do my math to re-create a pattern each time, so I figured out the dimensions I need the socks to end up in inches for my size and work based on measurement rather than counting rows.
-
Since I'm using 100% natural fibers, I find that a k2p2 cuff compensates better for the lack of elastic in the fiber.
My pattern is a cuff-down, afterthought heel pattern using a magic-loop technique
In the last 13 months I have completed 30 pairs of socks for myself (and a bonus pair for my mom for Christmas!) and now wear only hand-knit socks. I wouldn't call myself an expert at making socks, but I know this pattern well enough that I was able to write all of the steps out on an index card off the top of my head at dinner last week between when we ordered and when the food came ... So I figured it was time to write this up as a blog post!
Sizing
I wear a women's US shoe size 9. I’ll provide my foot measurements and the sock dimensions that I’ve found work for me. It might take some trial and error to figure out what works for your feet (remember that with natural fibers and no elastic in the material there will be less stretch to the fabric.
My Measurements
-
Foot Circumference: 8.25”
-
Foot length: 9.5”
Sock Dimensions
-
Width: between 3-3.25”
-
Cuff: Anything over 1” depending on how much yarn you have and what kind of sock you want. I’ve found that anything less than that (if you’re not using elastic) just slips off of my heel.
-
Length (heel to toe): 8.5-9” (The amount of stretch buffer you want is going to depend on how stretchy the yarn is, if it's superwash merino, you want the sock tighter because it will stretch on its own, if it's a stiff wool with almost no stretch then you want to add in a bit more space).
-
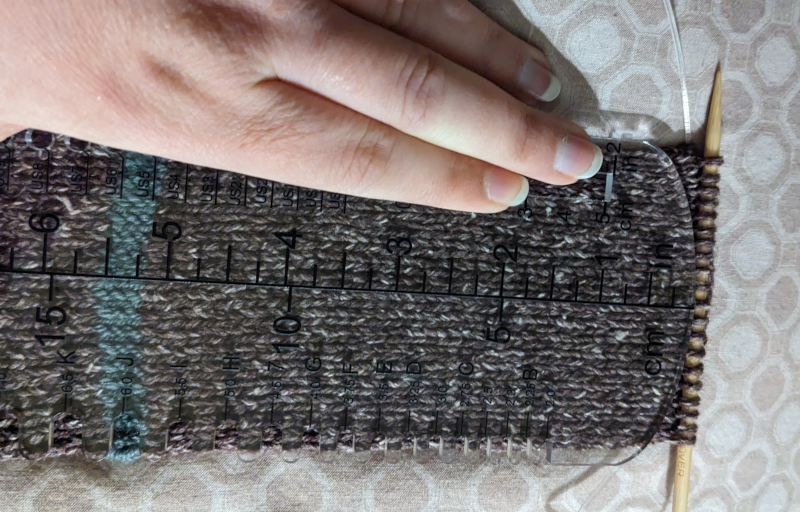
Space between afterthought heel marker and toe decrease: 5.25” (heel and toe combined are about 3.75” long and you want .5-1” stretch buffer, so this is the main measurement you’ll want to calculate to your size: foot length – 4.25”).
Gauge
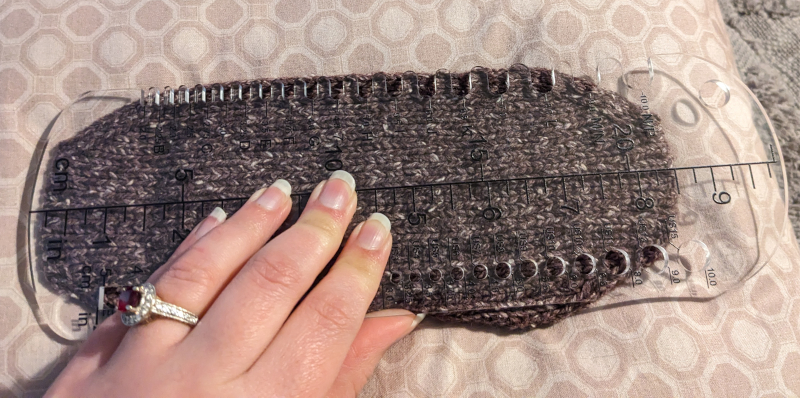
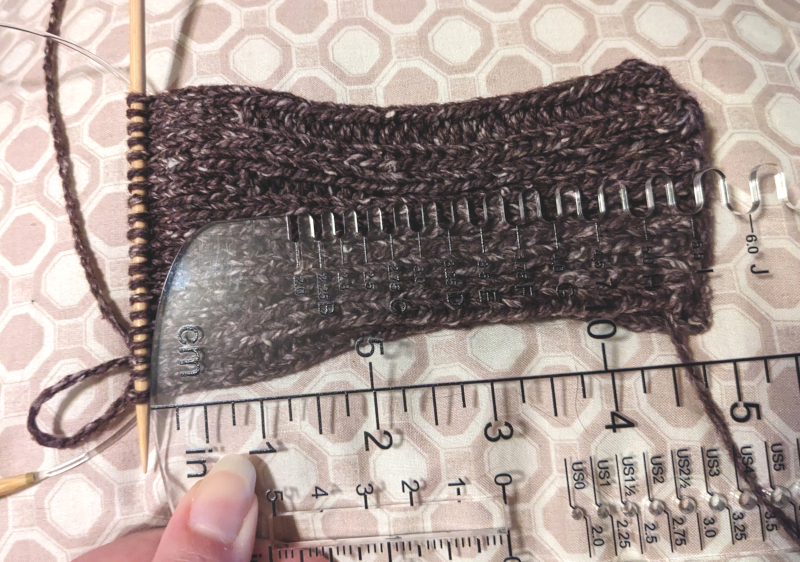
It is important to be able to predict what size your project will come out. To do that, you make a swatch or square, I shoot for 3"x3" since that's the width I need for my socks. With socks you typically want to use a smaller gauge needle than recommended for a tighter knit for durability (so it recommends needle size 5-7 for your yarn, you might want to use a 3-4). Then you measure how many stitches per inch (stitch gauge), and how many rows per inch (row gauge).
Your life will be easier for this pattern if you work in units of 4 (since it’s a magic loop, it needs to have an even number of total stitches since they will be divided between two needles, and it will be easier for your cuff ribbing if you have an even number of stitches per needle). So if your stitch gauge indicates that 17 stitches = 3”, it is easier to round up to 18 stitches per needle (36 stitches overall).
Notes
For the pattern below, I’m going to use the number of stitches and dimensions for the socks I’m currently working on. It’s a 2-ply DK weight meriono wool and cotton yarn on US 5 needles. I would still recommend doing your own stitch gauge first because different knitters have different tensions etc.
I am also assuming that you know how to knit and perl, but I’ll link to videos of other techniques that I reference.
Pattern
1) Cast on 40 stitches using a long tail cast on over two needles. I usually measure out the length of the tail as the length of my arm + the length of my hand. Your mileage may vary.
2a) Pull out one needle. Split the stitches so that half are on each needle using the magic loop method. Make sure that the stitches are all facing the same direction and not twisted on the needles. The needle with the active thread trailing off of it should be your back needle.
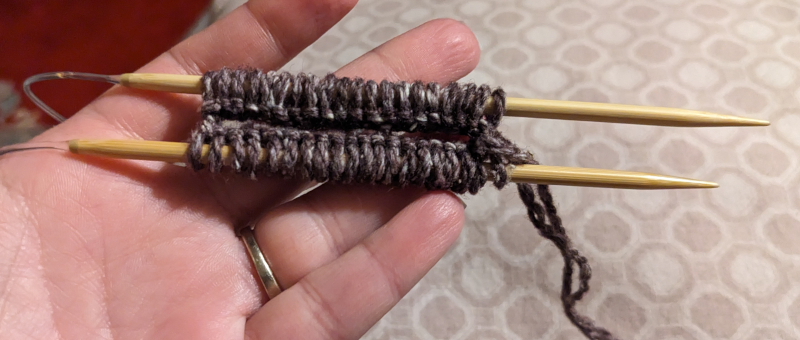
2b) Then, pull the back needle forward (keeping the stitches on the cable) so that you can use the needle to start knitting into the set of stitches on the front needle. Knit 2, perl 2 on each side.
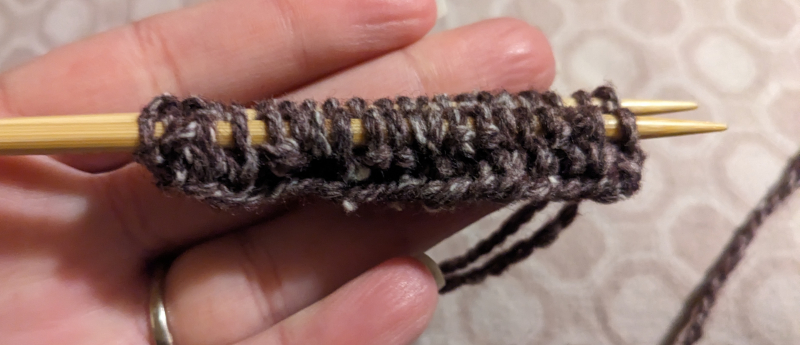
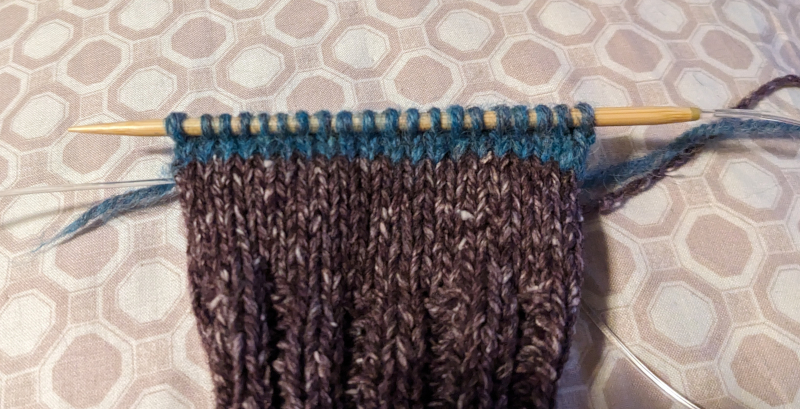
3) K2P2 cuff to desired length (using a standard hank of yarn for a pair, I can usually get between 1-4” cuffs, if you’ve got two smaller skeins, or a large skein you can get longer cuffs).
4) Knit for 1” after your ribbing ends.
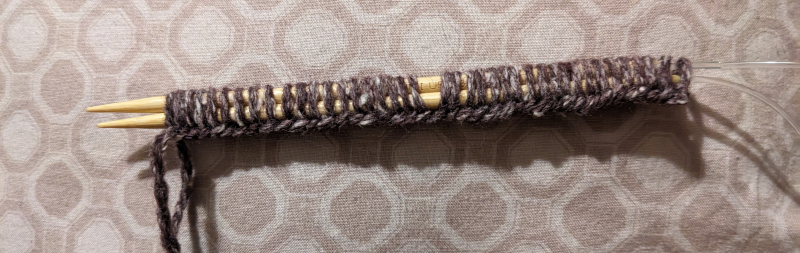
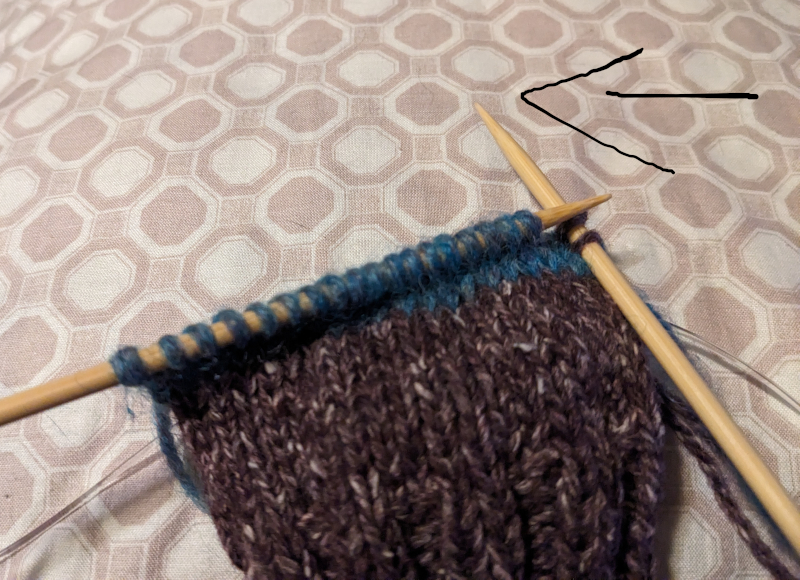
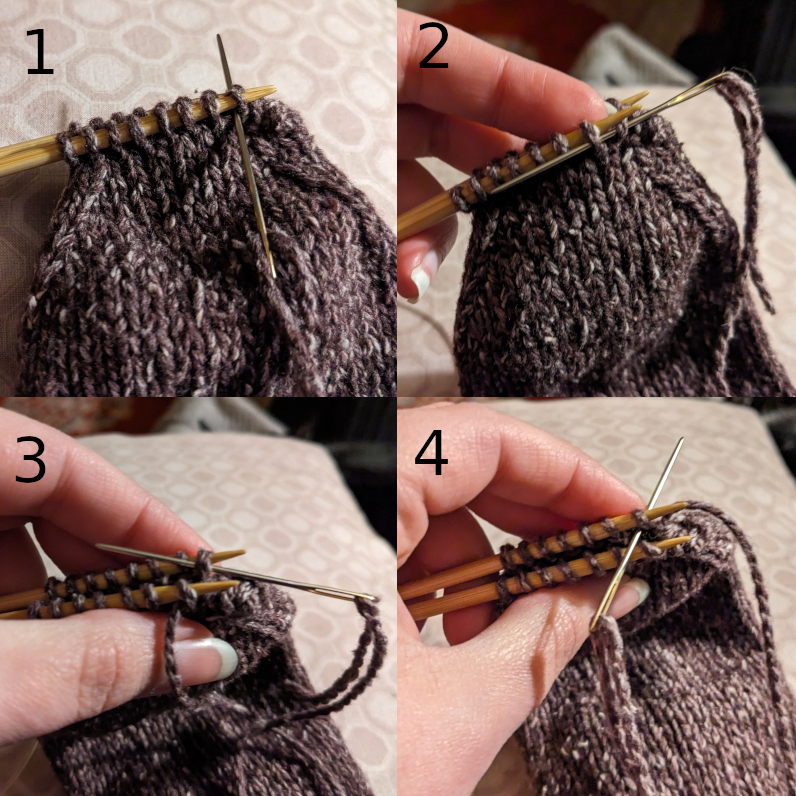
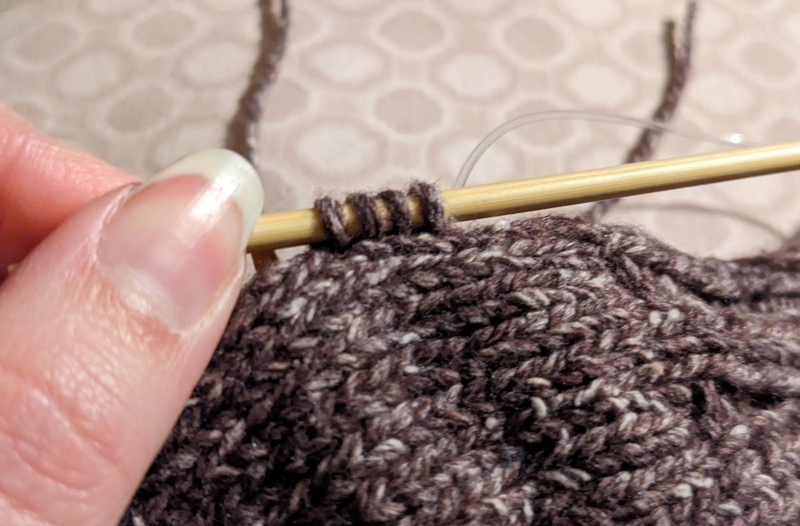
5) Place afterthought heel:
-
Using a waste yarn (~ 5 yds or less of smooth, plied yarn in a contrasting color) knit into one side of your needles.
-
For the next row (without using magic loop) turn your work and perl the next row on the same side.
-
Turn and knit the next row (again without using magic loop).
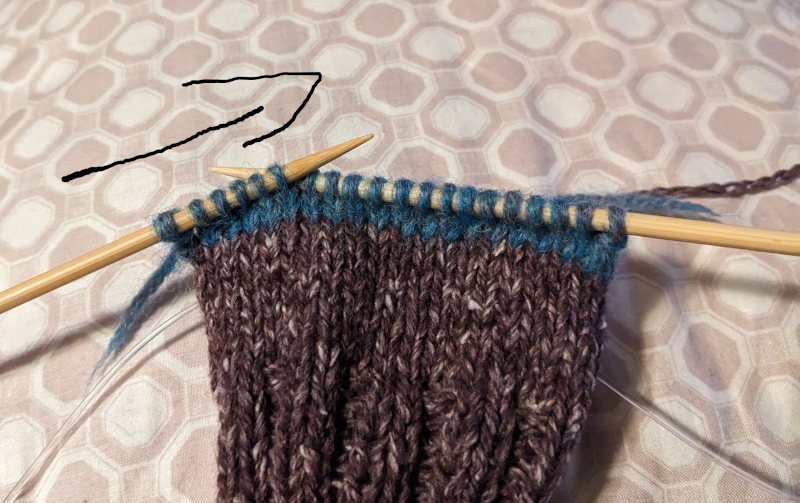
- Slip heel stitches from the front needle (right in the picture below) onto the back needle (left in the picture below) so that the needle is facing where your sock yarn is on the main body of your sock.
6) Resume knitting with your sock yarn over the heel stitches. Resume magic loop.
7) Knit foot of sock until you have 5.25” after heel.
8) Decrease toe:
-
Knit 1, ssk, knit all but last 3, k2tog, knit 1. Repeat on both needles.
-
Knit next row.
-
Repeat last two instructions until you have 10 stitches per needle (or half the original number of stitches per needle you started with).
-
Knit next row.
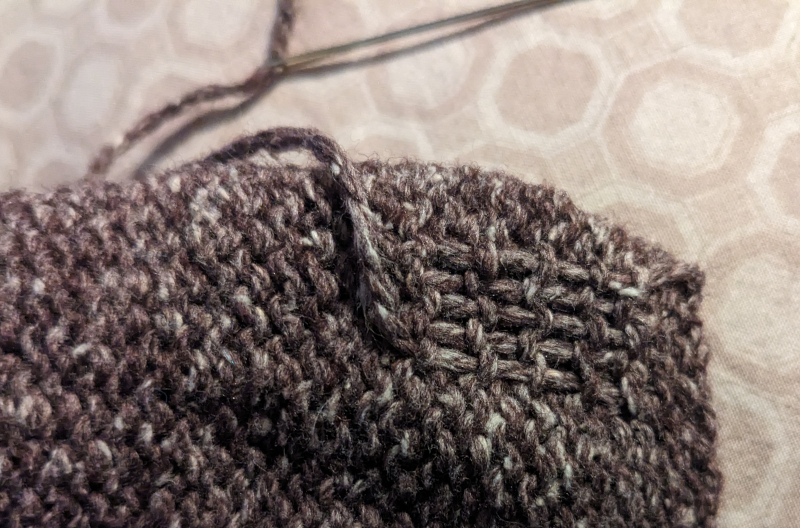
9) *Graft the toe together:
-
Cut the yarn leaving yourself about 10-12” tail of yarn to work with.
-
Insert needle knitwise into first stitch on front needle, slip stitch off of needle.
-
Insert needle perlwise into next stitch on front needle, pull thread taught through both loops.
-
Insert needle perlwise into first stitch on back needle, slip stitch off of needle.
-
Insert needle knitwise into next stitch on back needle, pull thread taught through both loops (make sure that thread stays between the top of the sock and the needles and doesn’t loop over needles).
-
Repeat until only two loops remaining on needles. Pull needles out of last two loops.
-
Put needle into the space between those two loops and pass the trailing thread to the inside of the sock.

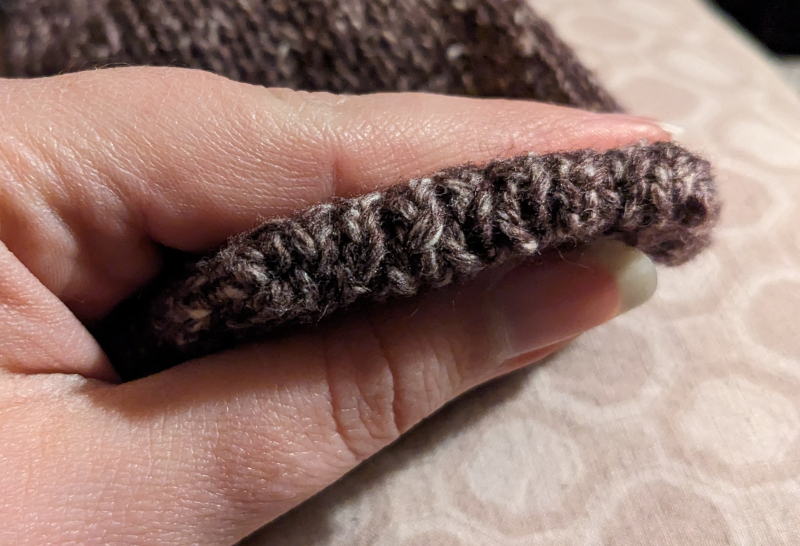
- Tug on thread gently to pull those loops in. It’s a bit tricky, but once you get the hang of it you should end up with a seamless toe!
*You will find way more tutorials of this method under a different name … but we’re not using that term anymore because it is named after a military leader (arguably a war criminal) who didn’t invent the stitch, probably didn’t even knit himself, and doesn’t really need to be linked to our socks a century after he advocated for women to ‘do their part’ in the war effort by making socks for soldiers.
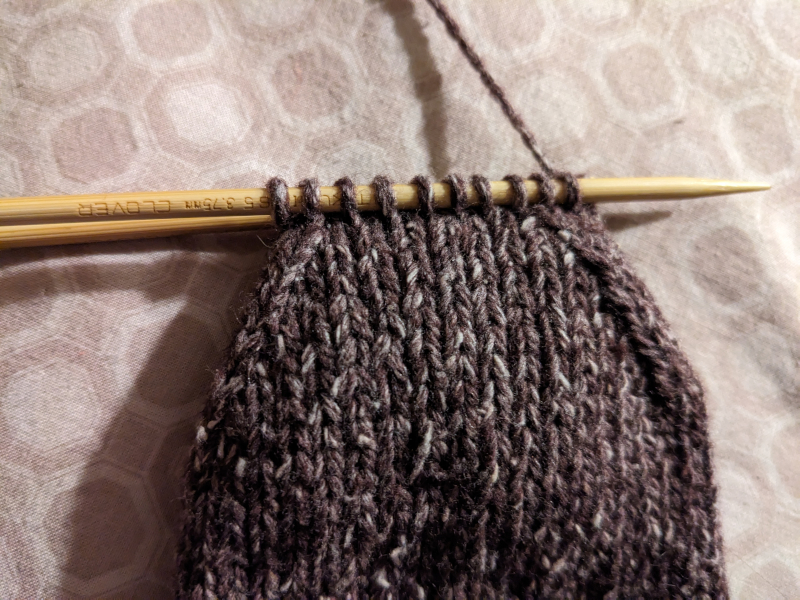
10) Afterthought Heel:
-
With one needle, pick up the right leg of the stitches in the row directly above the waste yarn stitches from right to left.
-
With the other needle, pick up the right leg of the stitches in the row directly below the waste yarn stitches from right to left. (I forgot to take a picture until I’d already started the next step, so the first few stitches have been pulled out. Sorry, that’s not something I could just redo for the photo.)
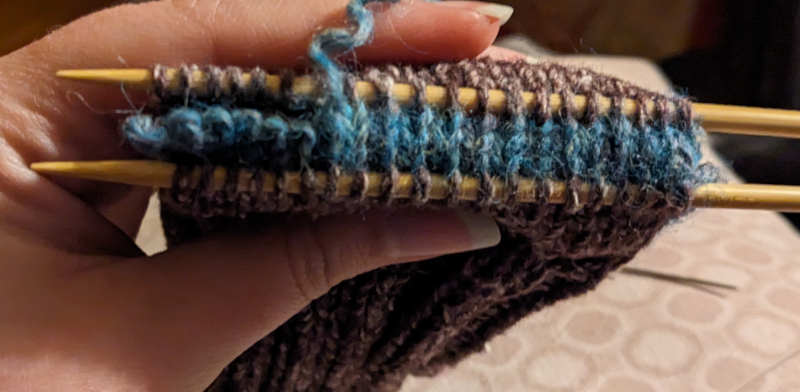
- Carefully pull the waste yarn out of the stitches and unravel.
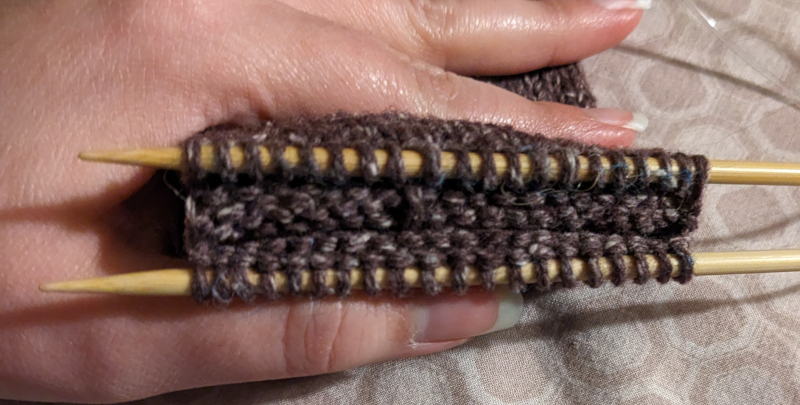
- In the space between the needles pick up and knit/PUK 4 sts (so you don’t end up with a gap).
- Knit all stitches on needle 1.
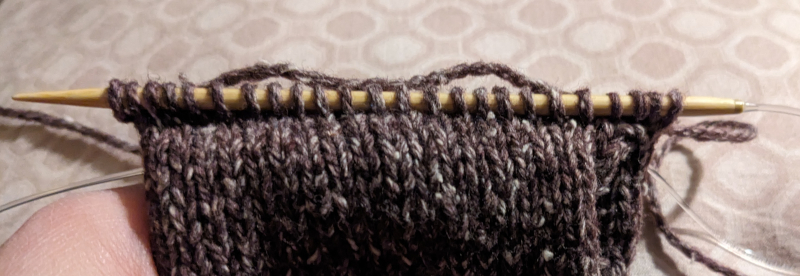
-
In the space between the needles pick up and knit/PUK 4 sts (so you don’t end up with a gap).
-
Knit all stitches on needle 2.
-
Next two rows (both needles): k2tog, knit to end of needle.
-
Knit next three rows. (This totals 6 rows after you joined a new thread. If you lose count, you can verify by checking how many times the yarn has crossed at the edge of the row above the join tail – you want to see 5 visible rows + the tail itself marks the first row.)

11) Decrease heel:
-
Knit 1, ssk, knit all but last 3, k2tog, knit 1. Repeat on both needles.
-
Knit next row.
-
Repeat last two instructions until you have 10 stitches per needle.*
-
Knit next row.
-
Graft the toe together. (See step 9 above for detailed directions).
- Proportionally, you want to decrease your heel and toe to half your original number of stitches. However, I like to keep things even on my decreases, so where it would be an odd number per needle I decrease to half -1 for the toe and half +1 for the heel because you’ll feel the heel decrease more when walking on it. So for a sock that started with 18 stitches per needle I would decrease the toe to 8 and the heel to 10.
12) Tie in your loose ends (make sure that the the loose ends from the heel and toe end up on back of the heel and top of the foot, otherwise you will feel them when you walk on them).
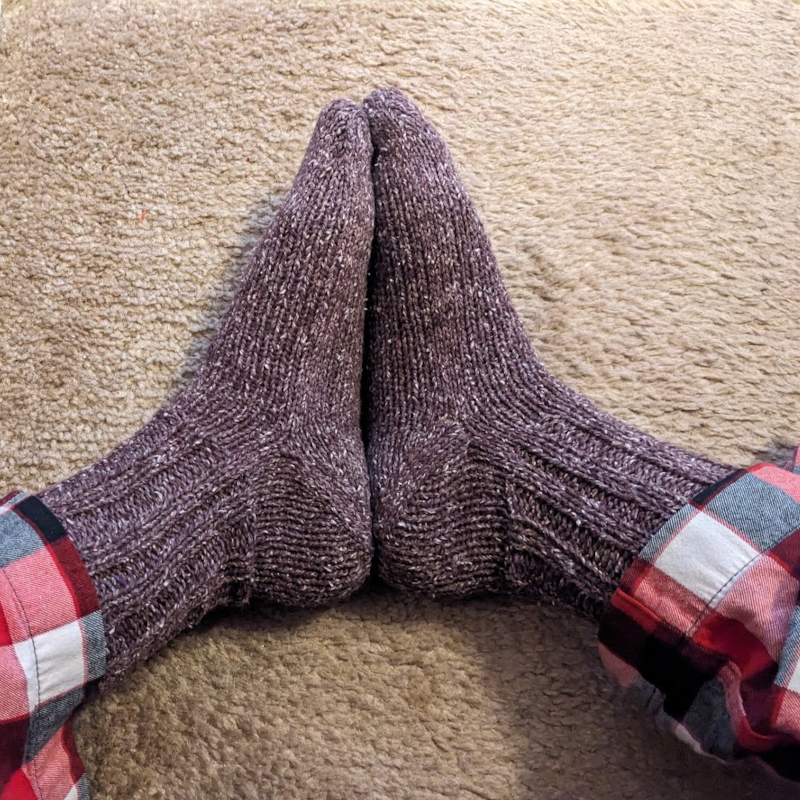
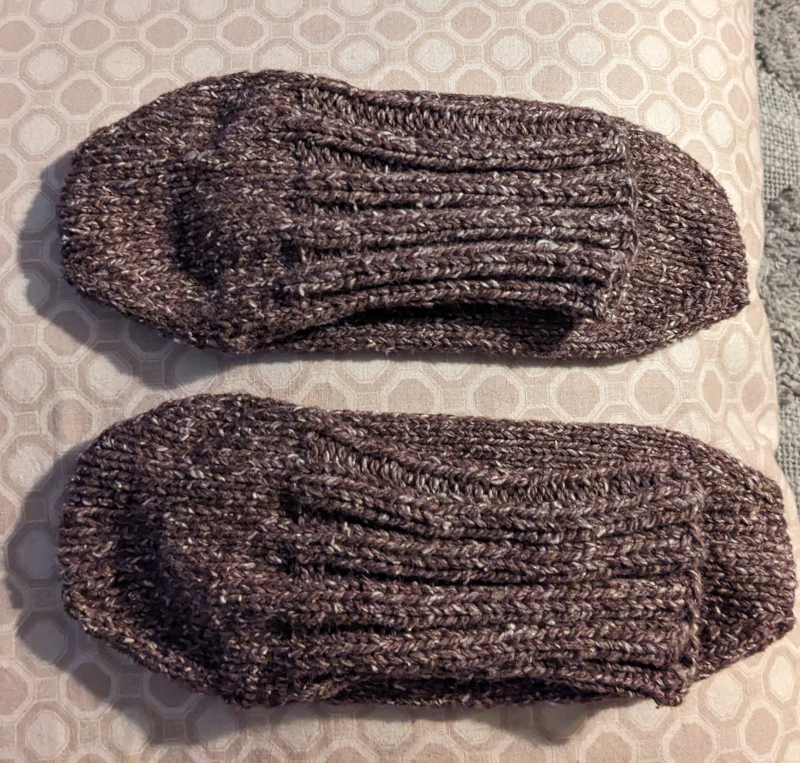
Completed Socks!
Congratulations, you've made your socks! The goal of this tutorial is that it's adaptive. Play around with it, figure out the measurements that work for you, then you can use whatever size thread you want without having to re-work your pattern each time! I'll probably do a follow-up post on cleaning and care of handmade natural fiber socks, but for now, suffice it to say: follow the instructions on your yarn label!
Thanks for following along!
Bonus cat picture
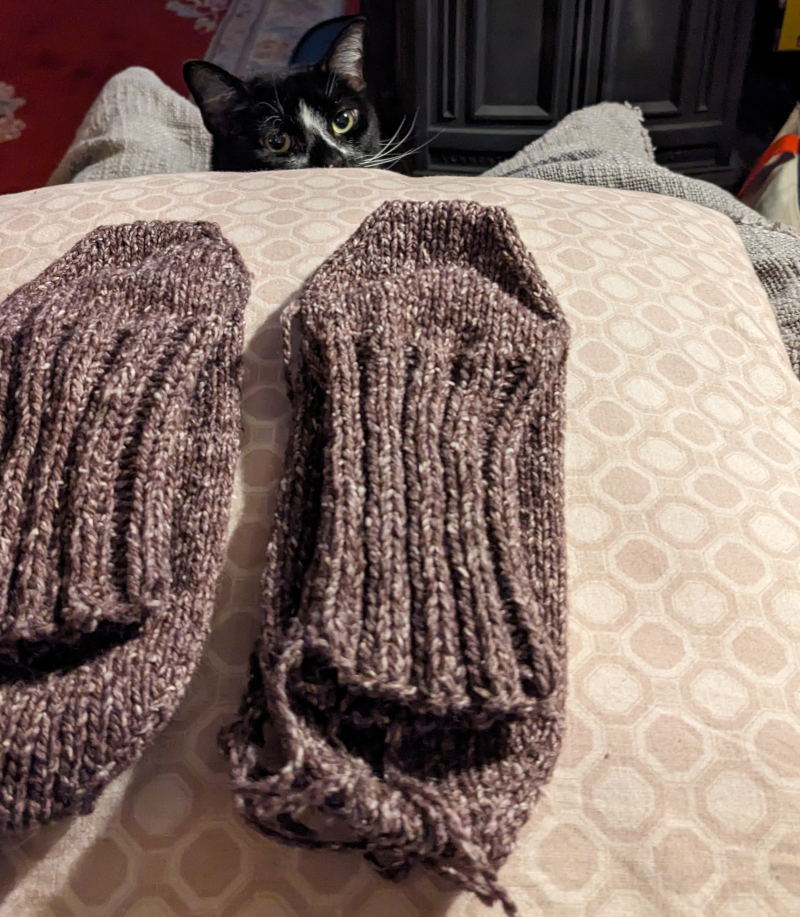
I did abour 90% of the work on these socks (and therefore took most of the pictures for this tutorial) while sitting on my couch. Which means that there was a cat lurking just out of frame of most of those pictures being a very good girl and not messing with my knitting. This also explains why most of the photos are poorly lit and a bit oddly framed: they were taken on a pillow, on my lap, with just lamps because I'm a photosensitive vampire who doesn't like overhead lights.
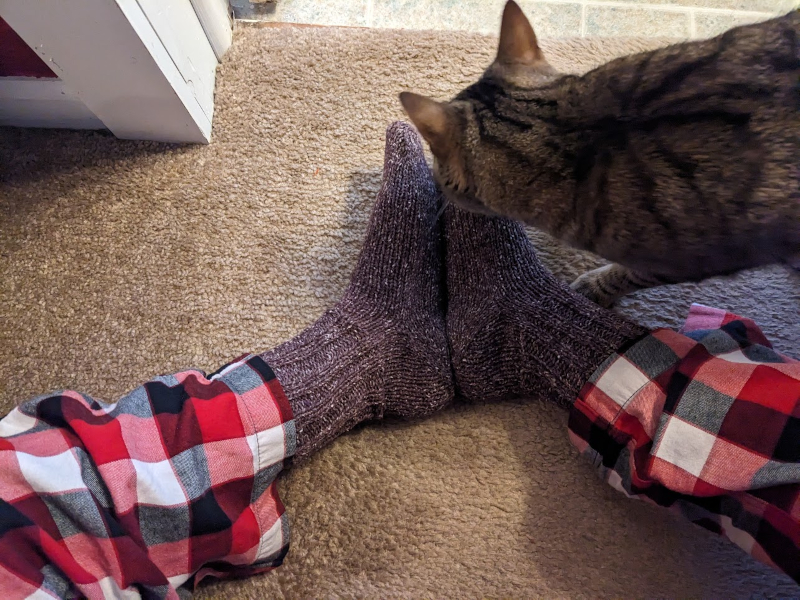
And a bonus bonus cat picture of the other cat, who does not understand why I would sit on the floor if it wasn't to pet a cat.
Free Soft Wear

This tutorial is released under CC BY-SA 4.0! Please feel free to share and adapt the content of this post!